 MENU
MENU
Terms & Conditions
Privacy Policy
Contact & Opening Hours


The Rainbow Valley shop will close on July 25th, 2025
You can find online shop at - Rainbow Valley Crafts
If you are close enough, you can Click & Collect

This is known as "Closing the Ring" (clr) and takes a little bit of practice. You may not be able to do it first time - I couldn’t! Sometimes I still get it wrong and have to remake all the stitches.
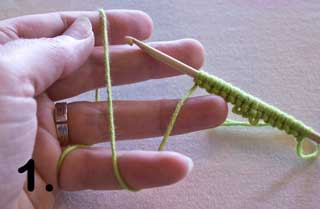
1. Anchor the yarn around your little finger.
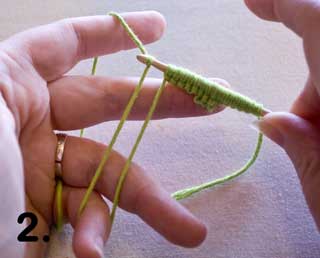
2. Wrap the yarn around the hook
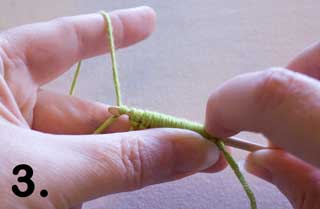
3. Carefully bunch the stitches up to the end of the hook.
Bunching the stitches up tight together makes them looser on the hook and easier to draw the yarn through.
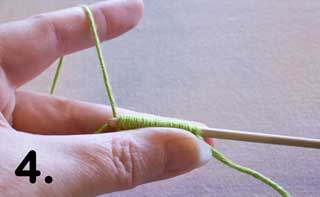
4. Hold the stitches underneath the hook with your thumb and 2nd finger.
Do not hold the hook itself.
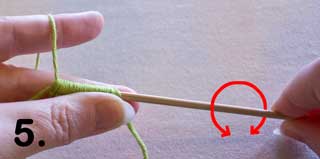
5. Slowly draw the yarn through, rolling the hook between you right
fingers and thumb as you do so. This helps prevent the head catching
on the stitches.
Don’t worry about getting the fingers on your left hand caught in the yarn - they are supposed to. This is to prevent the yarn being pulled through as you will need the loop in a minute.
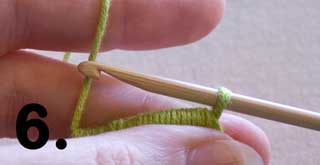
6. When the head is through safely, push the loop along the hook
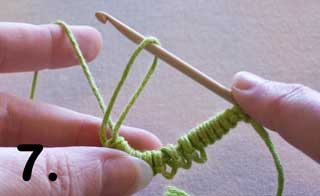
7. Slip the loop from your fingers and place it on to the hook.
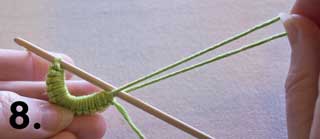
8. Pull up the first loop on the hook so that the stitches fit snugly
together.
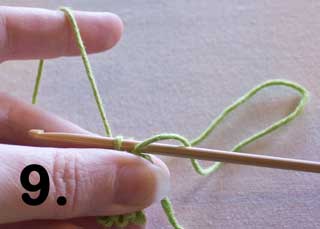
9. Push the two loops together and hold the ring firmly in place with
your left hand.
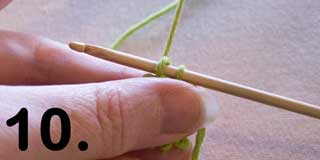
10. Pull the working end through tightening the first loop
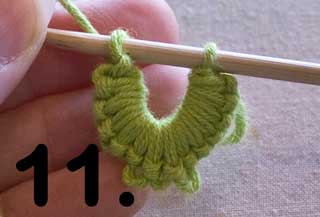
11. So that they both sit snugly on the hook.
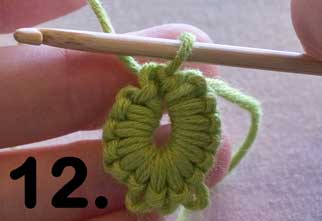
12. Yarn over hook and draw through both loops on the hook.
You have completed your first Crotat ring
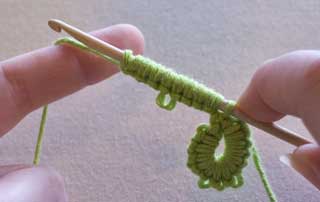
Ring 2: Work 4 ds, picot, and another 4 ds,
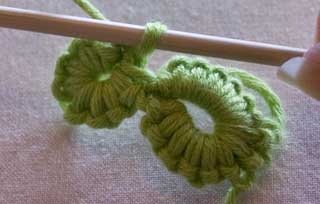
then close as for the first ring.
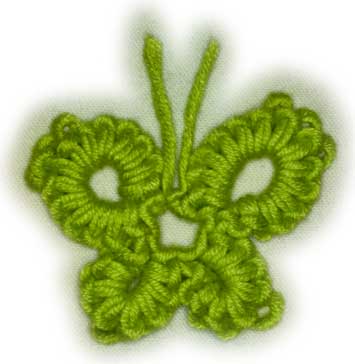
Ring 3 is the same as ring 2 and Ring 4 is the same as ring 1.
To fasten off, just cut the end and pull it through as you would for any other crocheted piece.
To make the antennae, tie the two ends together and cut them to size.