 MENU
MENU
Terms & Conditions
Privacy Policy
Contact & Opening Hours

The Rainbow Valley shop will close on July 25th, 2025
You can find online shop at - Rainbow Valley Crafts
If you are close enough, you can Click & Collect

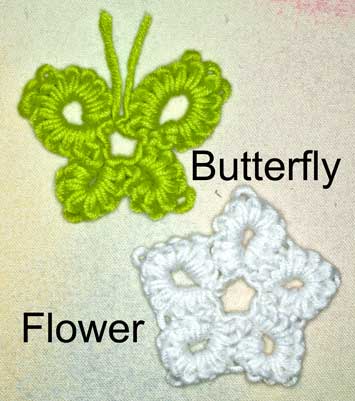
Ring 1: 6 ds, p, ds, p, ds, p, 6 ds, close ring.
Ring 2: 4 ds, p, 4 ds, close ring.
Ring 3: as ring 2.
Ring 4: as ring 1.
Fasten off and tie ends to make antennae.
The pattern can also be shown as a stitch diagram.

Unless you have tatted before, in any form, this pattern will look like a load of Double Dutch to you.
We are going to work through it, learning the stitches and terms as we go.
Crotatting is worked in two main stages - putting the stitches on the hook and taking them back off.

To put the stitches on the hook, all you need is the first finger of your left hand, hold all of the others out of the way.

The main Crotat stitch is the "Double Stitch" (ds).
It is the commonly known as the "Cow Hitch" and is worked in two halves.

1. Make a slip knot on your hook.
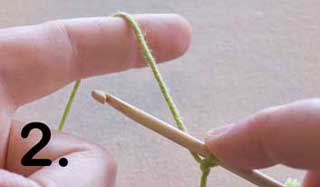
2. Place the yarn over your finger as normal.
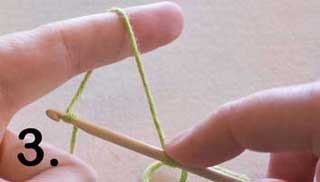
3. Using the yarn at the back, wrap the yarn over the hook.
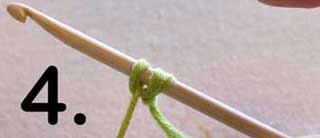
4. Drop the yarn from your finger and slide the stitch up to the slip
knot.

1. Replace the yarn on your finger.

2. Fold your finger so that the yarn over the back is showing.

3. Slide the hook under the yarn.
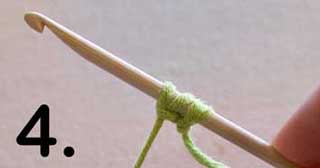
4. Drop the yarn from your finger and slide the stitch up to the first
half.
This is your Double Stitch (ds) completed.

Make another 5 ds in the same way.
It is important to make sure your stitches fit snugly together but are not tight on the hook. If they are too tight you will not be able to draw the hook and yarn through them to close the ring.

To make a Picot (p), you simply leave a gap after the previous ds.
You can either use your finger . .

. . . . or a "picot gauge" to help make the space.
A picot gauge can be a piece of card cut to the right width or those wooden stirrers you get when you drink coffee out.

When you slide the ds up tight, it forms a loop.
Repeat this another twice so that you have 3 picots.

Then make another 5 ds.
You now have - 6 ds, p, ds, p, ds, p, 6 ds.
This can also be written as - 6 ds, p, (ds, p) twice, 6 ds.