 MENU
MENUFlower
Ring 1: 3 ds, p, (3 ds, p) twice, 3 ds, close ring.
Rings 2-4: 3 ds, jp, 3 ds, p, 3 ds, p, 3 ds, close ring.
Ring 5: 3 ds, jp to ring 4, 3 ds, p, 3 ds, jp to ring 1, 3ds, close ring.
Fasten off, tie ends together and sew them in.

Terms & Conditions
Privacy Policy
Contact & Opening Hours

The Rainbow Valley shop will close on July 25th, 2025
You can find online shop at - Rainbow Valley Crafts
If you are close enough, you can Click & Collect


A joining picot is used to join two rings together when you want them held in a certain place.
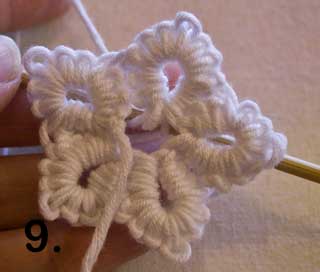
The flower uses joining picots to keep the "petals" in place.
Ring 1: 3 ds, p, (3 ds, p) twice, 3 ds, close ring.
Rings 2-4: 3 ds, jp, 3 ds, p, 3 ds, p, 3 ds, close ring.
Ring 5: 3 ds, jp to ring 4, 3 ds, p, 3 ds, jp to ring 1, 3ds, close ring.
Fasten off, tie ends together and sew them in.
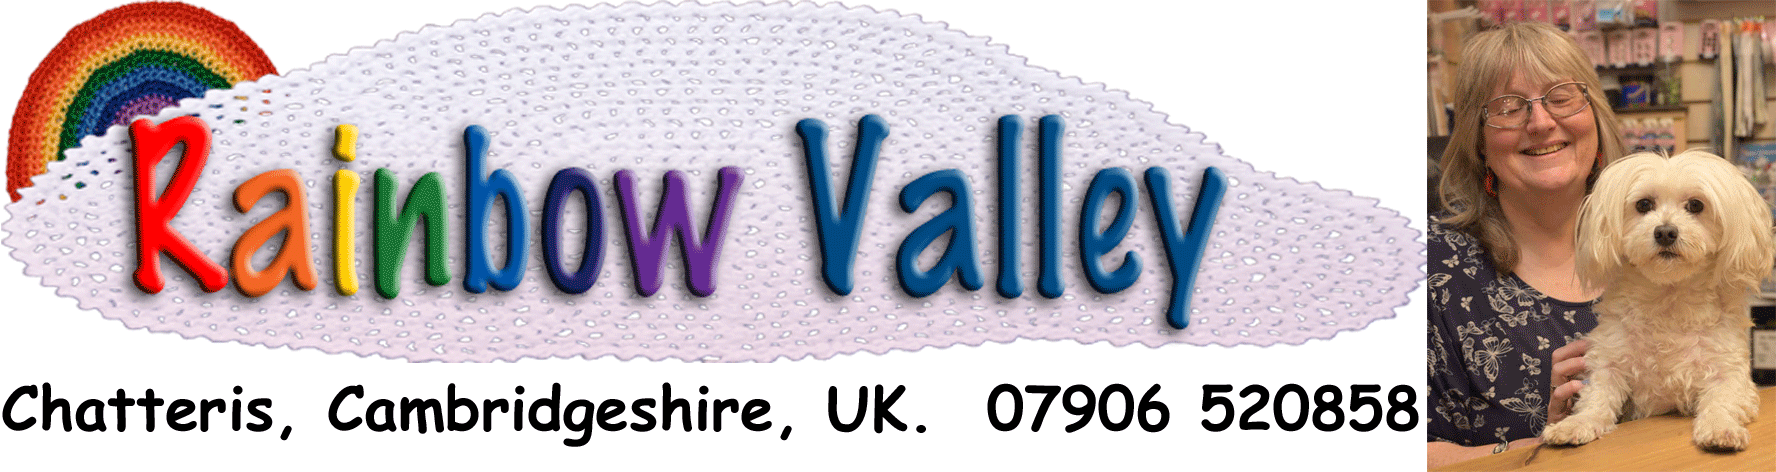
1. Complete the 1st ring.
2. Work the 1st 3 ds of the 2nd ring.

3. Hold ring 1 and insert the hook in to the picot.

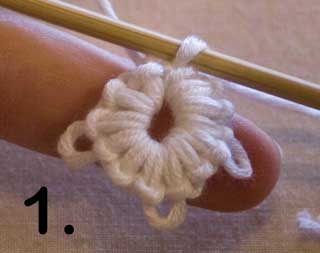
4. Yarn over hook
5. And draw through.
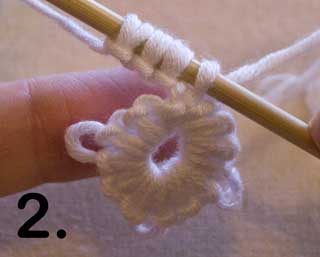
Complete the ring as in the pattern and repeat for rings 3 and 4.
Ring 5 is a little different as it has two joining picots. Work it as for rings 2-4 up to the 2nd joining picot.

Fold the work around so that you can insert the hook in the correct picot
on ring 1.
6. If you fold the work around to the front
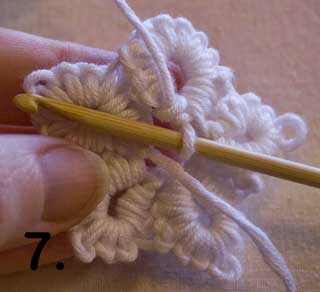
7. Your hook will end up in front of the work when you have completed
it.
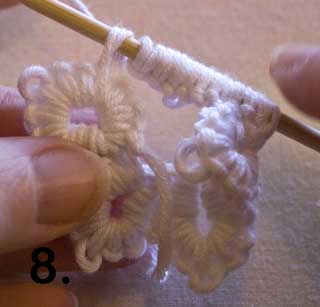
8. If you fold the work around to the back
9. Your hook will end up behind the work when you have completed it.
While this is not important when you are working on a single layered motif, you will need to take note of where you need the hook to end up when working multi-layered motifs.
These are the basics of Crotat. There are other things to learn but
you will now be able to follow any basic crotat pattern.
When you have practised a little, and are confident with everything you have learned so far, then you can carry on with the slightly more difficult techniques which come next.